
Several freeware and shareware software packages are available to manage the grabbing,
labeling, and saving of the webcam images. Programs which operate on the Macintosh
can be downloaded from
http://www.pure-mac.com and
http://www.parfaitimage.com/dc50_simple_webcam_download.html.
In the arrangement described here, a spare Mac IIsi computer is dedicated to capturing the images with a B&W Connectix QuickCam. The shareware program MacWebCam is used to control the camera and periodically (every two minutes during daylight hours) write images (up to a maximum of six) to the hard drive. The images are periodically (every six minutes) transferred by ftp over ethernet cable to the Linnux machine under control of a cron script, and are then available for the web server.
The QuickCam can be mounted either inside or outside a building. One simple approach is to
attach the camera to the inside surface of a window. Although tape can be used to attach
the camera, over time tape tends to peel away from the window, and creates a risk of the
camera falling to the floor. Also, tape sometimes leaves a messy residue on the glass. Instead,
silicone cement can be used to attach paper clips which provide anchor points for
rubber bands to press the camera to the window. In the picture below four paper clips and
two rubber bands are used to carry this out.
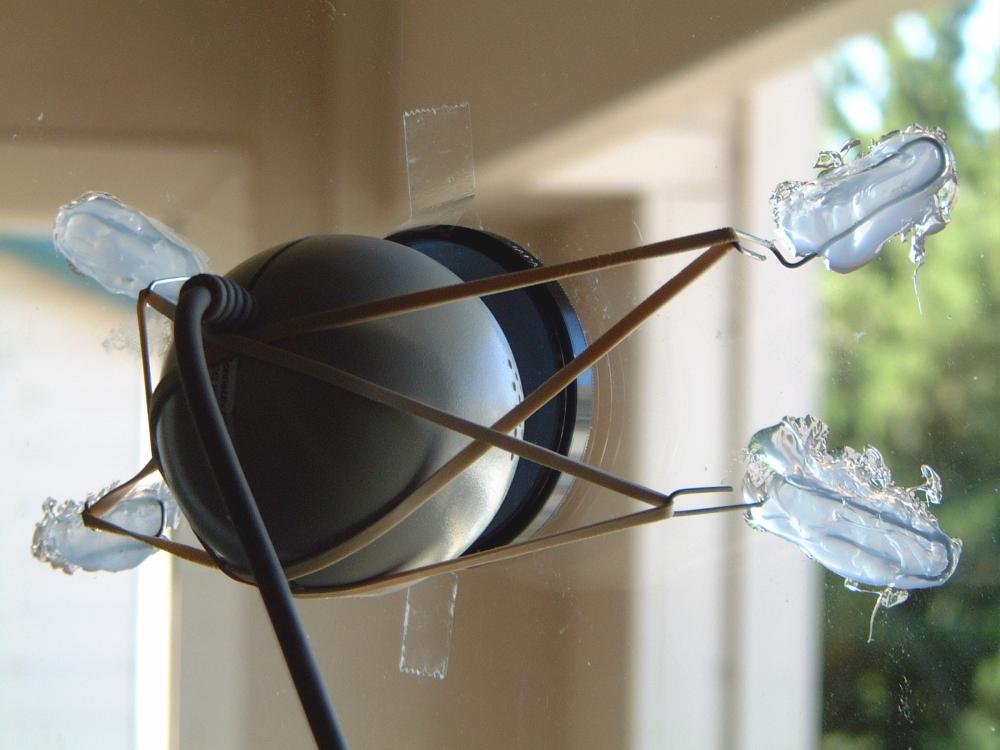
Note that there is a filter between the camera and the window pane; this is a spare camera filter which is used to decrease the light intensity entering the camera which would otherwise overwhelm the sensitive CCD. In this case a #80B (blue) is used, but other wavelength filters will work equally well. The filter is held in place with Scotch tape.
The indoor mounting method has the advantage that outdoor dust and insects will not settle on the
camera and filter. Only the outside surface of the window pane needs to be periodically cleaned.
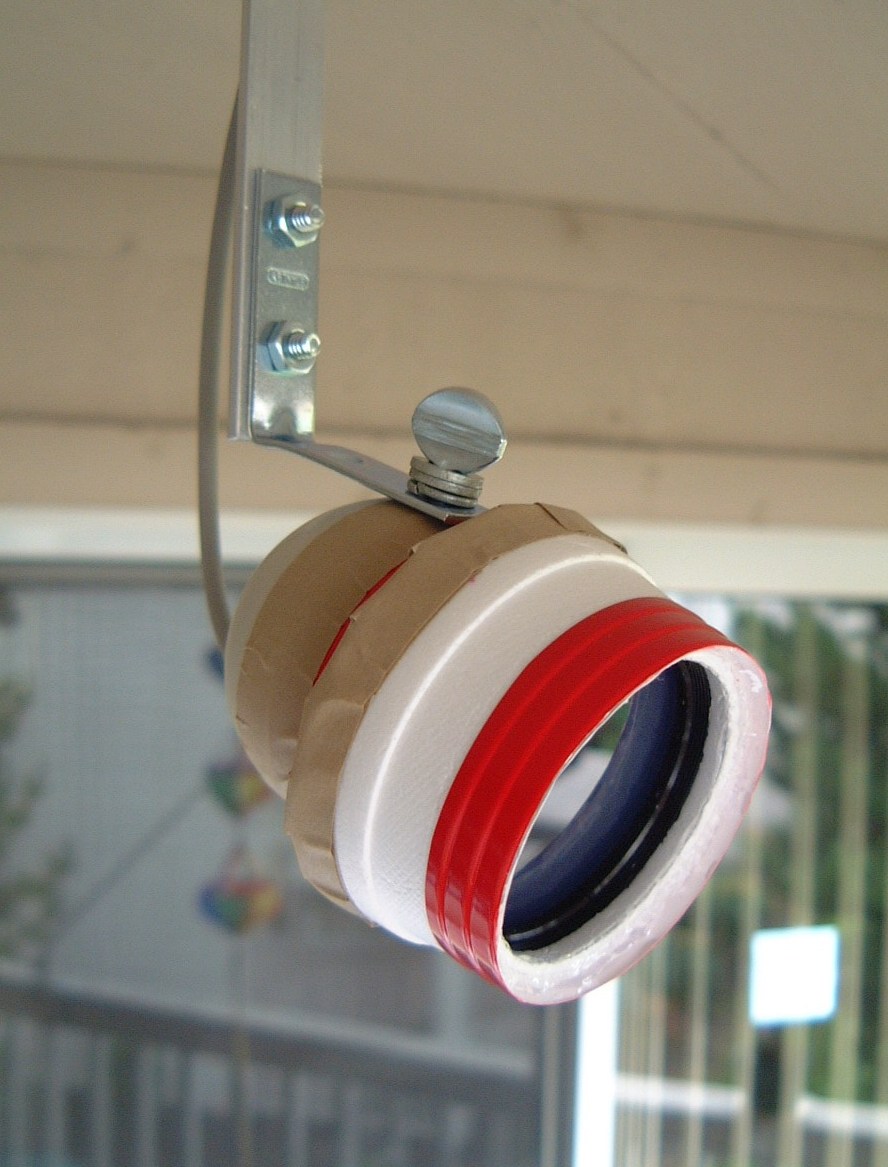
If a protected outdoor location, say under a patio or balcony overhang, is available, then the
camera can be mounted there. In this case the camera could be positioned closer to the subject
of interest, say a bird feeder. The pictures below show a QuickCam mounted outdoors with stock
aluminum bar and corner braces. The filter was mounted in sections of styrofoam and plastic cups
held together with silicone cement. Paper tape is used for making the final closure of the
assemble so that it can be easily reopened if need be. Do not use wax coated paper cups since
the cement and tape will not stick to them.

The maximum cable length connecting the QuickCam to the Macintosh should not be greater than about 30 feet or else the picture will deteriorate. Also, do not run the cable close to AC power cords or else the picture will occassionally lose synchronization. Furthermore, the QuickCam's operating temperature range is from 10 to 40 deg C (50 to 104 deg F); operation at low temperatures produces a uniformly gray output with charge bleeding on bright areas as the device warms up.
The MacWebCam software is configured to write a JPEG image to the Macintosh every two minutes, with
a maximum of six stored images, during daylight hours. Although the software gives the user a
choice of what level of compression to use, the highest level that does not produce an error
appears to be 75%. The starting and stopping times in the program must be manually adjusted during
the year as the hours of daylight change. The Linux system, which runs the Apache web server, is
connected via ethernet cable to the Macintosh on an internal network.
The cron script file for Redhat Linux is
called "/etc/cron.6min/bird_feeder.cron" and consists of the following lines:
Note that the number of stored images, the time interval between images, and the ftp transfer time
per image are interdependent. If the time to transfer all the images from the Macintosh to the
Linux system exceeds the interval between QuickCam images, then the time stamps on the images
will most certainly be out of the expected sequence. However, even with a short transfer time,
there is a nonzero probability that a new exposure will have been made during the transfer interval
along with MacWebCam's renaming of the files, in which case two files will have the same
time stamp. Viewing or refreshing the browser window during the transfer interval can not
only be an additional cause of out of sequence images, but can result in partial frames being
displayed.
The html code to display the images could be something such as the following:
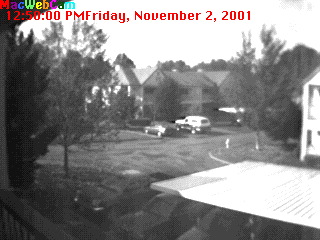
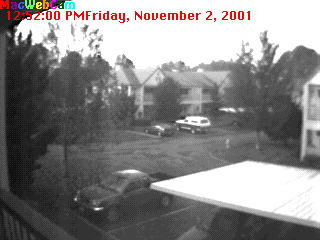
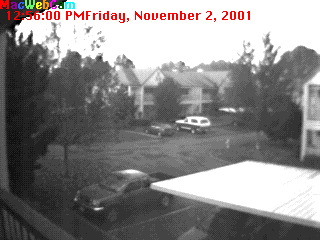
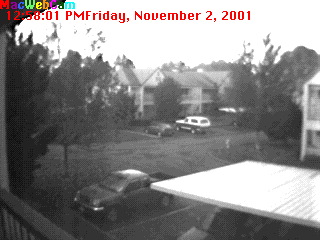
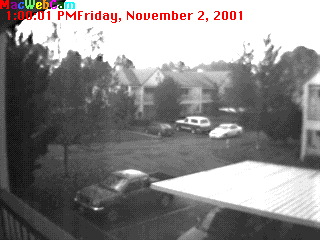
An example output of a window mounted web cam using the above html is shown below.
Note that although we have used the keys for security and convenience in logging on to the remote
machine, it is possible to in addition set up keys to log onto your machine from the remote
machine. One way, which should only be done if the remote machine is secure, is to also copy
your identification and id_dsa_1024_a files to the remote machine. The other way is to log
onto the remote machine and set up private and public keys as we did in steps 2 to 7 above.
The procedure described above assumes that both machines are running the same ssh2 software
issued by ssh.com. If you are running openssh and need to transfer to a machine running the
ssh.com software, proceed as follows:
For other combinations of openssh and ssh.com, see the websites www.cs.berkeley.edu/~dtliu/sshinterop.html or
http://defindit.com/readme_files/ssh.html for some helpful hints.
Now that you have set up keys, you can use sftp or scp to transfer files. A preferred method
is to use scp since fewer steps are required. One could for example use a command such as
Email:
#!/bin/sh
ftp -n 192.168.0.17 <
cd "/Desktop/La Cie 710-Q/Communications/Web Cam/Images"
binary
get BirdFeeder1.jpg /usr/local/bin/apache/html.parfaitimage.com/Images/BirdFeeder1.jpg
get BirdFeeder2.jpg /usr/local/bin/apache/html.parfaitimage.com/Images/BirdFeeder2.jpg
get BirdFeeder3.jpg /usr/local/bin/apache/html.parfaitimage.com/Images/BirdFeeder3.jpg
get BirdFeeder4.jpg /usr/local/bin/apache/html.parfaitimage.com/Images/BirdFeeder4.jpg
get BirdFeeder5.jpg /usr/local/bin/apache/html.parfaitimage.com/Images/BirdFeeder5.jpg
get BirdFeeder6.jpg /usr/local/bin/apache/html.parfaitimage.com/Images/BirdFeeder6.jpg
quit
with file with number 1 being the most recent file (as selected in the MacWebCam software).
Substitute your own IP address, password, and file locations and names when creating your
own script. The Macintosh, a spare Mac IIsi, runs the VersaTerm Pro ftp server. Besides
the cron script, the following entry in "/etc/crontab" must be made:
0,6,12,18,24,30,36,42,48,54 7-18 * * * root run-parts /etc/cron.6min
<HTML>
<HEAD>
<TITLE>View out of Window</TITLE>
<meta http-equiv="Refresh" content="360;  url=http://www.parfaitimage.com/window.html">
</HEAD>
<BODY TEXT="#FFFFFF" BGCOLOR="#3B5999" LINK="#FFFF00" VLINK="#FFD700">
<H2><CENTER><FONT FACE="Arial,Helvetica" COLOR="RED" SIZE=24>View out of Window</FONT></CENTER></H2>
<H3><CENTER><FONT FACE="Arial,Helvetica" COLOR="RED">Eugene, Oregon - Next to the Willamette River</FONT></CENTER></H3>
<CENTER>
<img src="Images/rain-bar_long.gif">
</CENTER>
<TABLE ALIGN=CENTER>
<TR>
<TD>
<img src="Images/BirdFeeder6.jpg"
  alt="Bird Feeder Picture 6">
</TD>
<TD>
<img src="Images/BirdFeeder5.jpg"
  alt="Bird Feeder Picture 5">
</TD>
</TR>
<TR>
<TD>
<img src="Images/BirdFeeder4.jpg"
  alt="Bird Feeder Picture 4">
</TD>
<TD>
<img src="Images/BirdFeeder3.jpg"
  alt="Bird Feeder Picture 3">
</TD>
</TR>
<TR>
<TD>
<img src="Images/BirdFeeder2.jpg"
  alt="Bird Feeder Picture 2">
</TD>
<TD>
<img src="Images/BirdFeeder1.jpg"
  alt="Bird Feeder Picture 1">
</TD>
</TR>
</TABLE>
<P>
<CENTER>
<img src="Images/rain-bar_long.gif">
</CENTER>
<P>
<CENTER><FONT FACE="Arial,Helvetica">A new set of pictures is available every six minutes during daylight hours.</FONT></CENTER>
<CENTER><FONT FACE="Arial,Helvetica">This page will also automatically reload every six minutes.</FONT></CENTER>
<IMG ALIGN=top WIDTH=1 HEIGHT=1
 SRC="http://www.parfaitimage.com/cgi-bin/bitmap_counter_hidden.cgi?Data/bird_feeder_count.dat">
</BODY>
</HTML>

A Simple Digital Camera Webcam
The Kodak DC50 Digital Camera can produce color pictures of up to 756x504 pixels and has optical
zoom of 3:1. The camera dates from the mid 1990s and can be obtained used for as little as $10
on eBay. When combined with a spare Macintosh and the proper software, the result can be a very
acceptable webcam. The camera could be mounted on a tripod behind a window to take sequential
pictures of a yard or bird feeder for example. Sunlight reflecting off the tripod or other
objects in the room can reflect off the window and into the camera lens. To minimize this, keep
the camera positioned close to the window pane, block as much sunlight as possible from illuminating
the area near the camera, and cover bright areas on the tripod with black paper or velvet. Because
the camera uses automatic focus, reflections can adversely affect the focus. If in spite of your
attempts to minimize reflections, the images are still sometimes out of focus, try taping aluminum foil
over the two auto focus sensors located at the front of the camera. This will result in the
camera focusing at infinity, which may solve the problem. The free program DC50 Simple Webcam, written
for the Macintosh to operate the camera as a webcam can be downloaded
HERE. The program
will also operate the Kodak DC40.
Secure Shell (SSH) Transfers
A variation on the above scheme of a local web server is to transfer your webcam images
to a remote web server.
In this case ordinary ftp present a security risk since the password of one of the systems
may go out on a cable that other people can monitor. The solution to this problem is to use one
of the protocols from the "secure shell" suite of programs. There are two versions of secure
secure shell, ssh1 and ssh2; the later version, by default, uses dsa encryption rather than
the earlier rsa encryption. Another issue to consider is that the ftp script shown above had
the password included in the script. Under ssh, that is not even an allowed method; it is
possible that someone might happen to look in the script and obtain your password. Instead, one
must set up private and public keys and place the public one on the remote machine. The naming
of files associated with the keys must follow the choices made in the configuration of ssh. Look
in /etc/ssh2/ssh2_config for the lines beginning with "IdentityFile" and "AuthorizationFile";
by default these will be followed by the names "identification" and "authorization",
respectively. We will use these names in the example below. Assuming that you have already
installed ssh2, do the following to set up the public and private keys:
1. Decide from what account you will be transferring your files, and go the the
~/.ssh2 directory. Create the directory if you have never run ssh2 from that account before.
2. Enter "ssh-keygen2". When you are prompted for a Passphrase, press Enter both times.
3. The preceding step creates the file id_dsa_1024_a, which is your private key, and the file
id_dsa_1024_a.pub, which is your public key. You may rename these files if you wish (see below).
4. In the same directory create the file "authorization" and enter the line
Key id_dsa_1024_a.pub
If you have renamed the file, use the new name on this line.
5. Next create the file "identification" and enter the line
IdKey id_dsa_1024_a
Again, if you have renamed the file, use the new name.
6. Now enter
chmod 600 id_dsa_1024_a id_dsa_1024_a.pub authorization
identification
for increased security.
7. We next need to copy the files authorization and id_dsa_1024_a.pub to the remote machine, and
put them in the remote machine's ~/.ssh2 directory. However it may be that files with the same
names, but for a different independent set of keys, already exist there. Therefore, before
transfering the files, be sure that nothing will be overwritten. If there are keys already in
the remote directory, change the names of your keys to avoid a conflict, and in the remote
authorization file, append the name of your public key at the end. At this stage you will be
able to log in to the remote machine without entering your password. In fact by creating an
alias for say "ssh remote_machine_name", all you have to do is enter the alias and you will be
logged on. The same convenience applies to secure ftp, sftp, and secure copy, scp.
1. On the openssh machine go to the .ssh directory. Create the directory if you have never run ssh
from that account before.
2. Enter "ssh-keygen -t dsa".
3. Enter the file name in which to save the key; choose "id_dsa", for example.
4. When the program asks for a passphrase, press the carriage return.
5. When the program asks for the same passphrase again, press the carriage return again.
6. Now enter "ssh-keygen -e -f id_dsa.pub > id_dsa_ex.pub". This exports the public key.
7. Transfer the file id_dsa_ex.pub to the remote machine running the ssh.com software, put it
in the .ssh2 directory and then rename it to "id_dsa.pub".
8. Edit the file "authorization", and insert a line which will read "Key id_dsa.pub".
9. You are now ready to log in without having to enter your password or passphrase.
10. If difficulties are encountered, try deleting the file "known_hosts" on the openssh machine.
scp /home/user/image1.jpg remote_host.com:/home/www/html.bird_feeders.com/Images
to transfer a file. Alas, although this works perfectly on the command line, it will likely
fail with the message 'No such file or directory' when put into a cron script.
The reason for this is that cron has a limited number of directories listed in
it's PATH environment variable. Thus in the cron script one should for example have
#!/bin/sh
PATH="$PATH:/usr/local/bin"; export PATH
scp /home/user/image*.jpg remote_host.com:/home/www/html.bird_feeders.com/Images
One could alternately use the "-S" qualifier such as in
#!/bin/sh
/usr/local/bin/scp -S /usr/local/bin/ssh2 /home/user/image*.jpg remote_host.com:/home/www/html.bird_feeders.com/Images
Note that we now need to supply the path for scp on the local host, and that "-S" needs to be followed
by the name, on the remote host, of the program to use for the encrypted connection. Besides these
methods, the file /etc/crontab also has a way to specify the path for executables on the local
host. While these cron scripts will work, you may find that a mail message is sent every
time the cron script runs. This can be avoided by adding the "-B" qualifier to the script. If
your server doesn't allow remote logins to the root account, try adding "user@" before "remote_host.com", and in
your crontab file on your client machine change "root" to "user" where "user" is your account name.
Finally, if the error message "warning: Unrecognized configuration parameter clearallforwardings"
appears, it is likely due to an out-of-date version of scp.